Knowledge Base
GPTWeb: Full Implementation Checklist
here's your complete GPTWeb implementation guide in table format — every step, why it matters, and exactly where to find it in the platform.
Phase 1: Account Setup
| # | Step | Why | Where |
|---|---|---|---|
| 1 | Sign up for free trial | Creates your GPTWeb account and live site — no credit card required | gptweb.com → Start Free Trial |
| 2 | Complete signup form | Establishes your admin login (email becomes your admin username) | Signup form: First Name, Last Name, Email, Company, Phone |
| 3 | Verify email and set password | Secures your account; minimum 10 characters recommended | Email inbox → Set Your Password link |
| 4 | Access your live GPTWeb site | Confirms your public-facing site is live and accessible immediately | gptweb.com/site/your-company-slug |
| 5 | Open Admin Panel | Central hub for all 20 configuration tabs and platform management | Cmd+Ctrl+A (Mac) or Ctrl+Alt+A (Windows/Linux) |
Phase 2: Core Configuration
| # | Step | Why | Where |
|---|---|---|---|
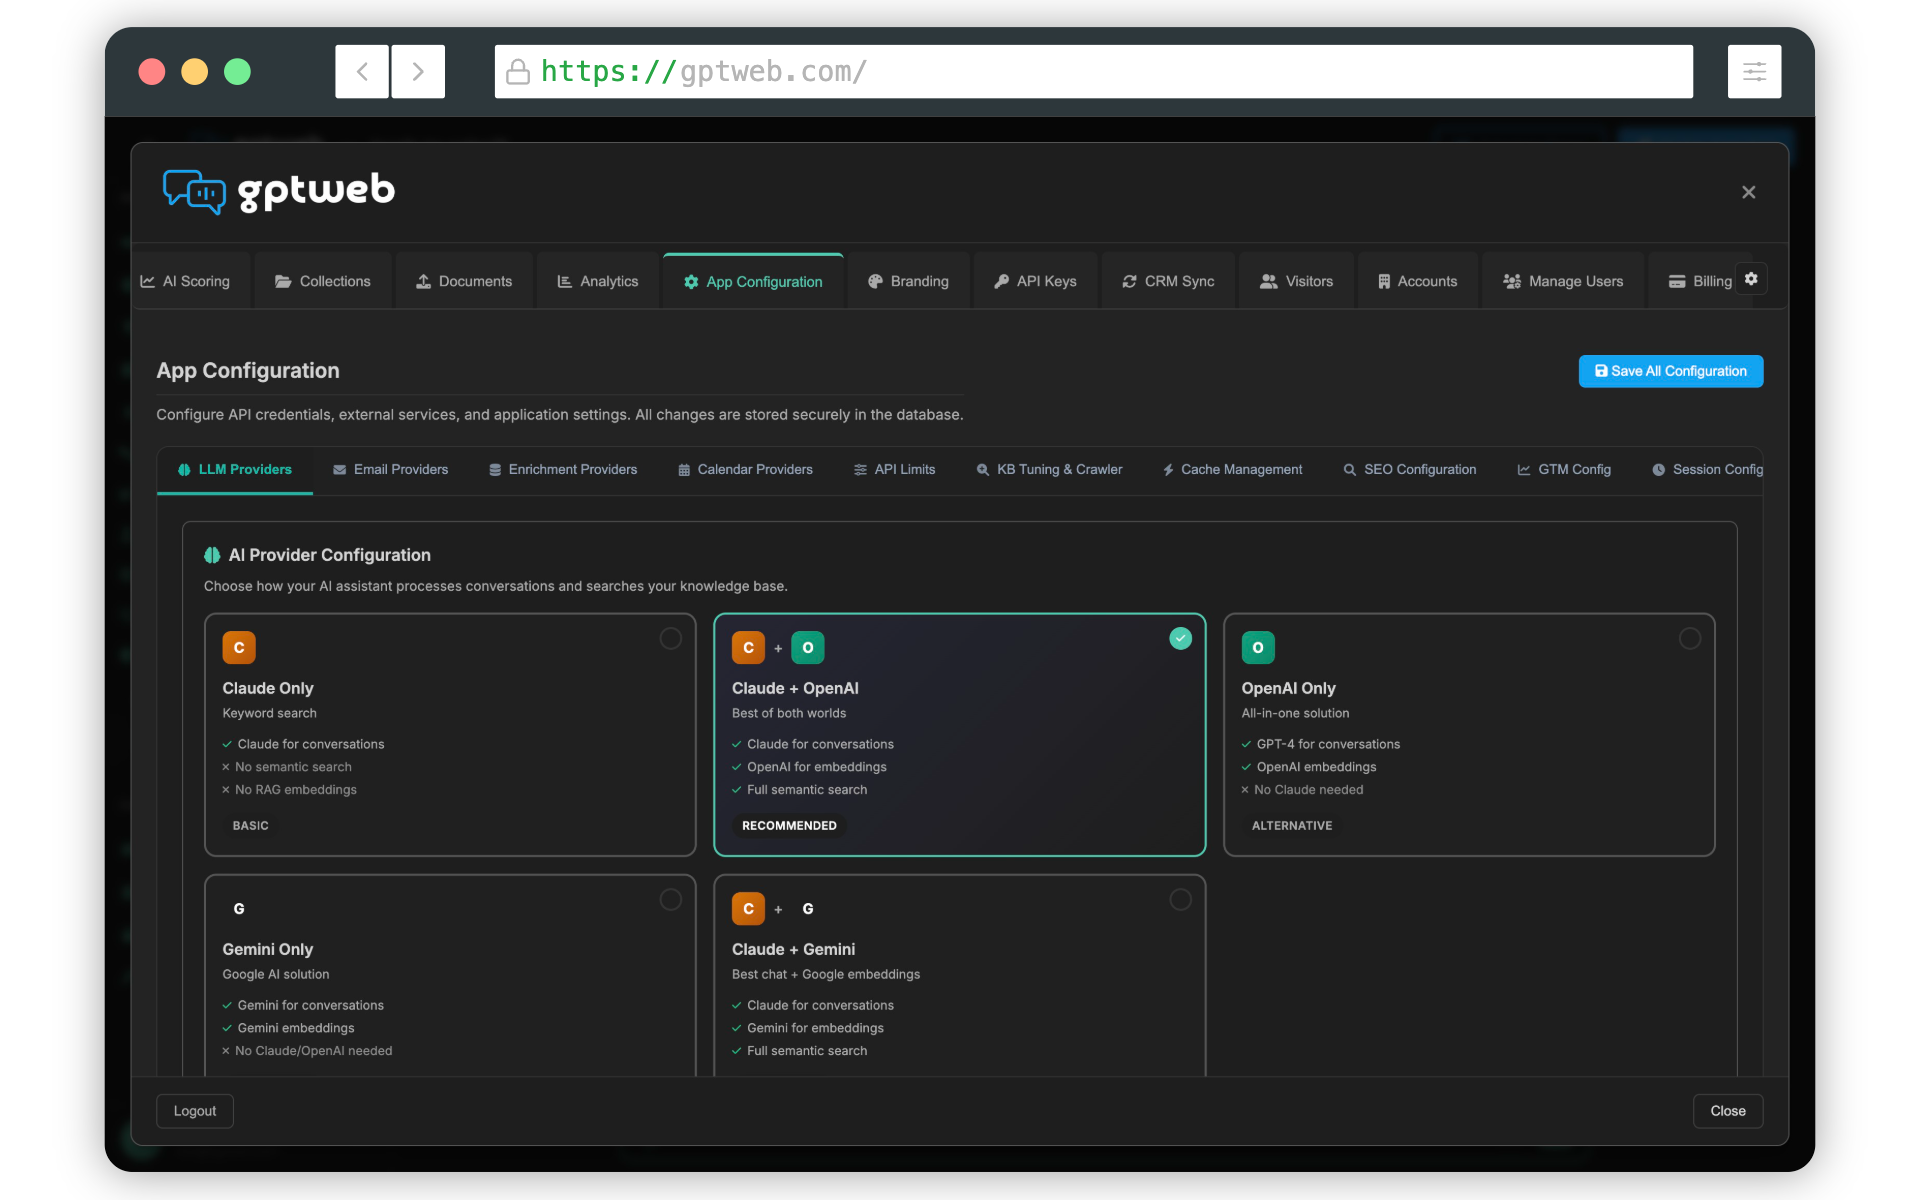
| 6 | Configure LLM API Keys (OpenAI, Anthropic, or Google Gemini) | Powers all AI responses — without this, GPTWeb cannot function | Admin Panel → App Configuration tab → API Keys |
| 7 | Set up email provider (SendGrid or Mailgun) | Enables transactional and bulk agentic email delivery | Admin Panel → App Configuration tab → Email Settings |
| 8 | Configure Branding (logo, 6-color Quick Setup, fonts, theme) | Ensures your site reflects your visual identity and brand standards | Admin Panel → Branding tab |
| 9 | Write Welcome Message | Shapes how your AI greets and orients every visitor on arrival | Admin Panel → Welcome Message tab |
| 10 | Write LLM Instructions | Defines your AI assistant's tone, persona, and behavioral rules | Admin Panel → LLM Instructions tab |
| 11 | Configure Legal settings | Adds privacy policy and terms of service required for compliance | Admin Panel → Legal tab |
Phase 3: Knowledge Base & Content
| # | Step | Why | Where |
|---|---|---|---|
| 12 | Create a Semantic Collection | Organizes content for intelligent routing; collection description drives semantic accuracy | Admin Panel → Collections tab → Create New Collection |
| 13 | Add detailed collection description | Used for semantic routing — the more specific, the more accurate AI retrieval | Admin Panel → Collections tab → Collection Description field |
| 14 | Upload RAG Documents (PDF, Word, TXT, MD, CSV) | Gives your AI curated knowledge; auto-chunked into ~1500 character segments with vector embeddings | Admin Panel → Documents tab → Select Collection → Upload Document |
| 15 | Upload Images for AI reference | Enriches responses with visual product and brand assets | Admin Panel → Documents tab → Images sub-tab |
| 16 | Upload CSV/Excel Chart Data | Enables AI-generated charts and data visualizations in responses | Admin Panel → Documents tab → Chart Data sub-tab |
| 17 | Upload Videos (MP4) | Enables in-chat video playback for demos, tutorials, and walkthroughs | Admin Panel → Documents tab → Videos sub-tab |
| 18 | Configure RAG Crawler | Auto-imports and keeps your website content fresh and indexed without manual uploads | Admin Panel → Collections tab → Crawler Settings |
| 19 | Build Prompt Library and Favorites | Guides visitors with suggested questions and quick-access navigation topics | Admin Panel → Prompt Library tab + Favorites tab |
Phase 4: Engagement & Automation
| # | Step | Why | Where |
|---|---|---|---|
| 20 | Define AI Scoring rules | Automatically qualifies and ranks visitors by engagement quality — powers DQL identification | Admin Panel → AI Scoring tab |
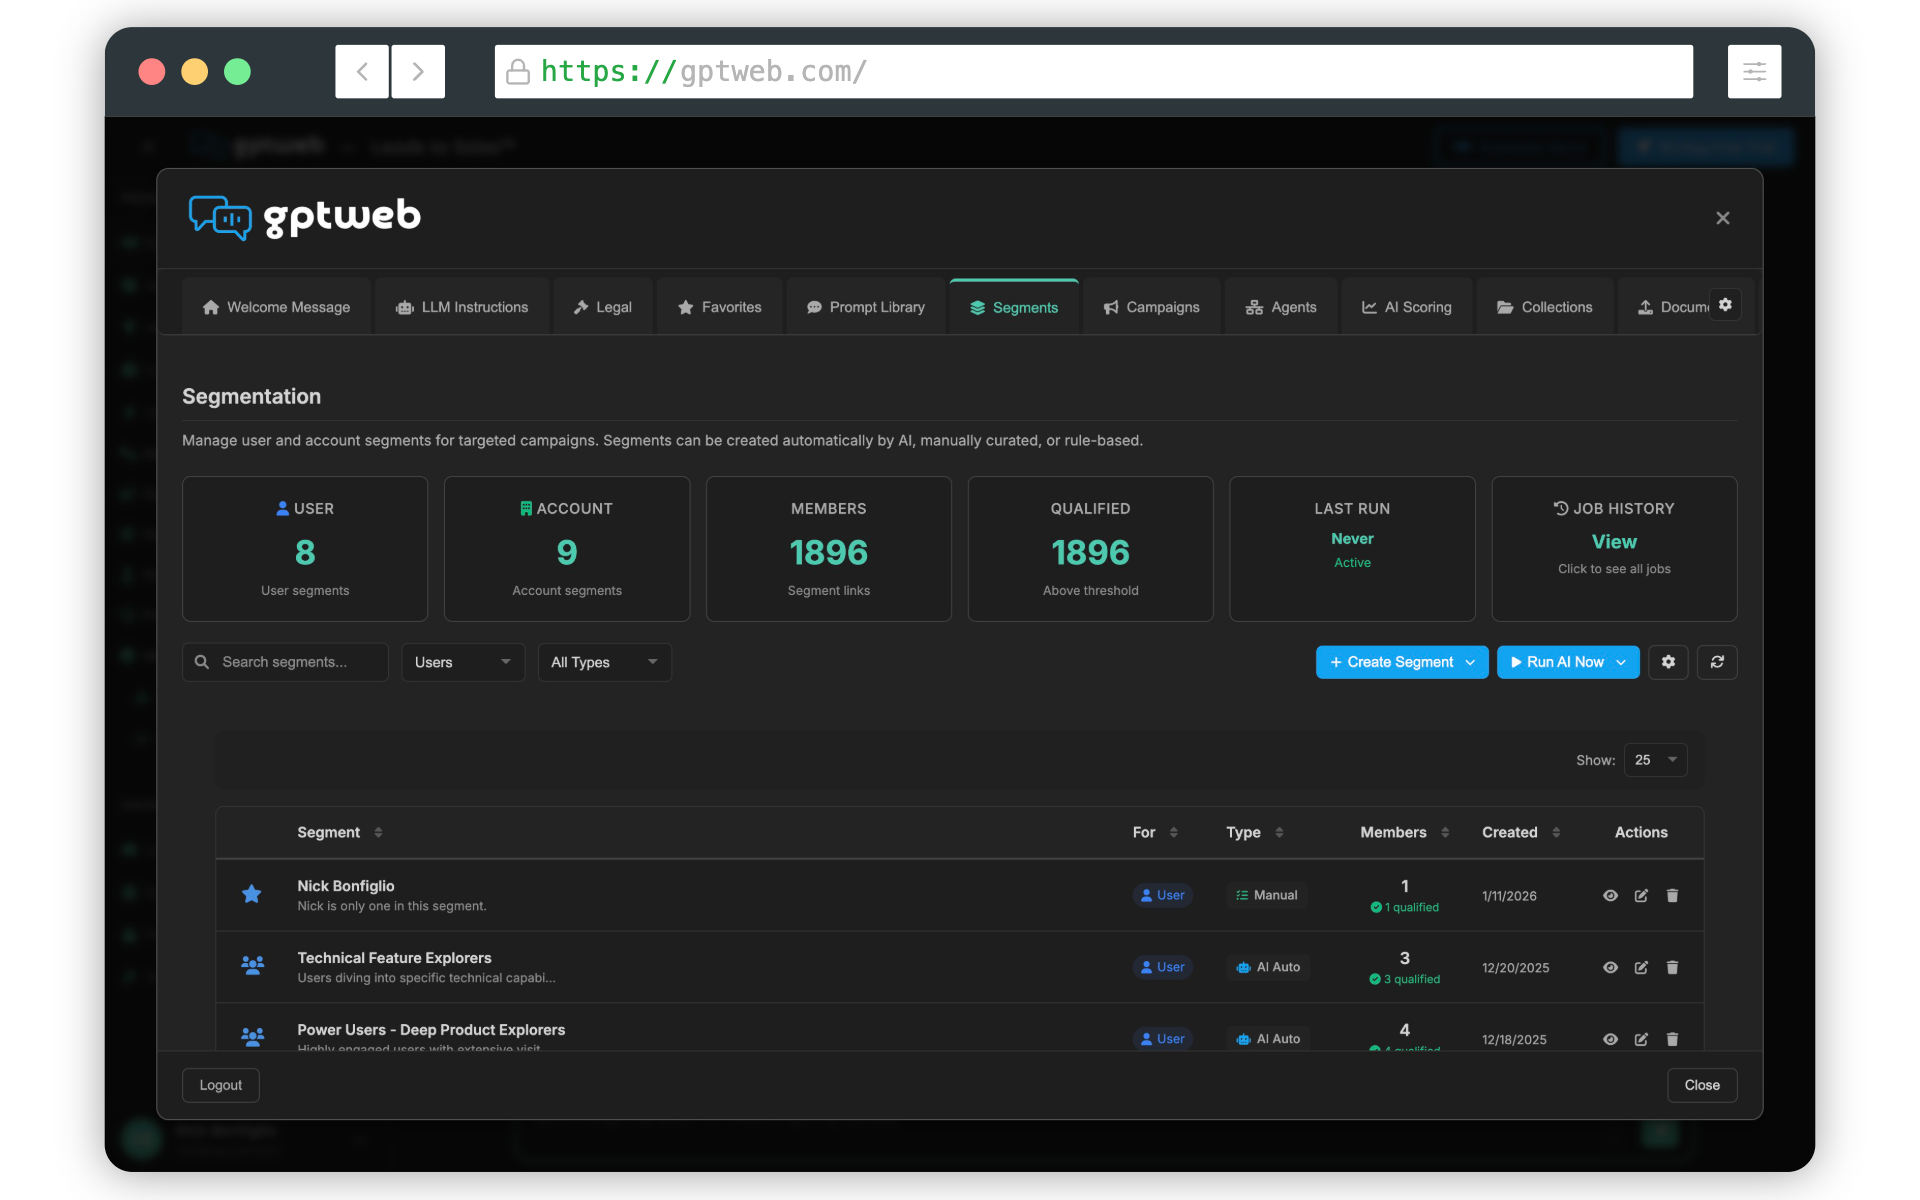
| 21 | Build Segments (conversational intent + static lists) | Groups visitors by behavior and intent for precise, targeted outreach | Admin Panel → Segments tab |
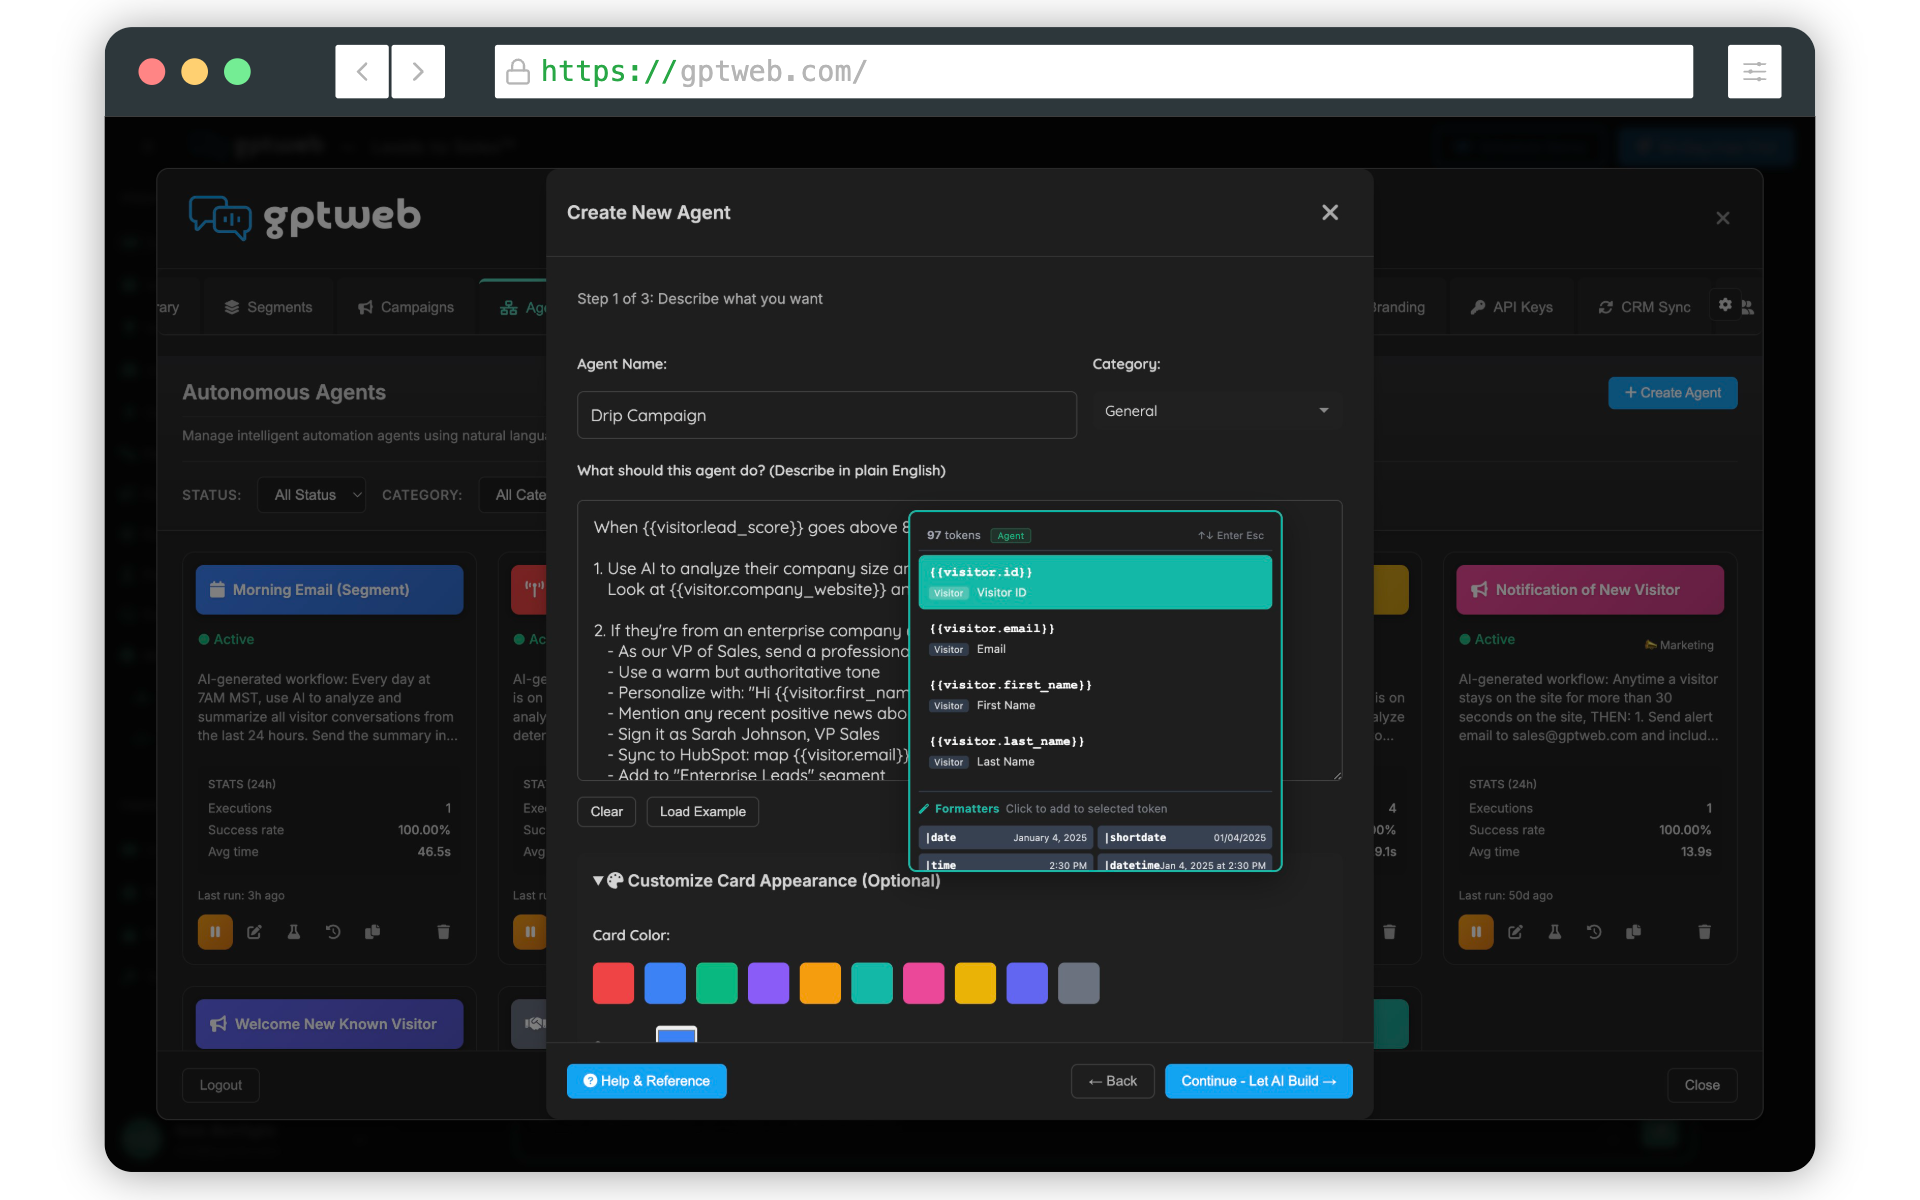
| 22 | Create Agents with NLP triggers and actions | Automates responses, emails, CRM updates, and more based on what visitors say | Admin Panel → Agents tab → Create Agent |
| 23 | Launch Campaigns targeting specific segments | Delivers targeted messages, offers, webinar invites, and CTAs to the right visitors | Admin Panel → Campaigns tab |
| 24 | Configure Agentic Email (transactional and bulk/batch) | Sends automated emails triggered by conversations and visitor actions | Admin Panel → Agents tab + Email configuration |
Phase 5: Integrations & Distribution
| # | Step | Why | Where |
|---|---|---|---|
| 25 | Connect CRM Sync (HubSpot or Salesforce) | Pushes DQL data and enriched visitor profiles directly into your CRM automatically | Admin Panel → CRM Sync tab |
| 26 | Embed GPTWeb Sidekick on existing website | Adds the conversational AI experience as an overlay on your current site | Admin Panel → Embed & Sidekick tab |
| 27 | Configure custom domain (optional) | Gives your GPTWeb site a branded, professional URL | Admin Panel → App Configuration → Domain Settings |
| 28 | Set up Open Graph meta tags | Improves social sharing previews on LinkedIn, Slack, Twitter/X, and Discord | Admin Panel → SEO / Meta tab → OG Settings |
| 29 | Enable Conversational SEO™ | Auto-generates llms.txt and AI-discoverable content so ChatGPT, Claude, and Perplexity can index your site | Admin Panel → SEO tab → Conversational SEO™ |
Phase 6: Optimize & Scale
| # | Step | Why | Where |
|---|---|---|---|
| 30 | Review Analytics dashboard | Tracks visitor engagement, DQL conversions, campaign performance, and token usage | Admin Panel → Analytics tab |
| 31 | Monitor Live Visitor View | Observe real-time visitor prompts and conversational behavior as it happens | Admin Panel → Live Visitor View tab |
| 32 | Refine AI Scoring thresholds | Improves DQL quality and accuracy as real visitor engagement data accumulates | Admin Panel → AI Scoring tab → Threshold Settings |
| 33 | Tune Segments and Campaigns | Optimizes targeting precision based on actual conversion and engagement data | Admin Panel → Segments tab + Campaigns tab |
| 34 | Manage Users and access controls | Adds team members and assigns appropriate admin access levels | Admin Panel → Manage Users tab |
| 35 | Review Billing and upgrade plan | Ensures token limits, visitor volumes, and crawled page allocations match your growth | Admin Panel → Billing tab |
35
Total Implementation Steps
< 1 Hour
Est. Time to Live Site
20
Admin Panel Tabs
3
LLM Providers Supported
Ready to go deeper on any phase? Explore Getting Started, Knowledge Base (RAG), CRM Sync, AI Scoring, or Agentic Workflow for detailed guidance. Questions? Reach us at sales@gptweb.com. GPTWeb is the future of engagement: websites and marketing automation combined, built for the AI era, built for now.