Knowledge Base
GPTWeb: New User Getting Started Guide
welcome to GPTWeb! This step-by-step guide is designed to take you from signed up to fully configured in about an hour. Follow each step in order for the smoothest experience.
Step 1: Sign Up for Your Free Trial (5 minutes)
Head to gptweb.com and click Start Free Trial. Complete the signup form with your First Name, Last Name, Email Address (this becomes your admin login), Company Name, and optional Phone Number. Click Start Free Trial, then check your inbox for a verification email from GPTWeb. Click the Set Your Password link, create a strong password (minimum 10 characters recommended), and click Set Password. You will be redirected to your new live GPTWeb site at a unique URL. No credit card required.
Step 2: Access the Admin Panel (2 minutes)
The Admin Panel is your control center for everything in GPTWeb. To open it, press Cmd+Ctrl+A on Mac or Ctrl+Alt+A on Windows and Linux. A login dialog will appear. Enter your signup email and password, then click Login. The Admin Panel contains 20 tabs organized horizontally. Scroll left and right to navigate all tabs.
Admin Panel Tab Overview
| Category | Tabs Included |
|---|---|
| Content and Experience | Welcome Message, Legal, LLM Instructions, Favorites, Prompt Library |
| Engagement and Automation | Segments, Campaigns, Agents, AI Scoring |
| Knowledge Base | Collections, Documents |
| Analytics | Analytics |
| Configuration | App Configuration, Branding, API Keys |
| Integrations | CRM Sync |
| Data Management | Visitors, Accounts |
| Administration | Billing, Manage Users |
Step 3: Configure API Keys and App Settings (10 minutes)
This is the most critical step. Without API keys, GPTWeb cannot function. In the Admin Panel, click the App Configuration tab. This single tab covers all major platform settings organized into sections. Scroll through each section to complete your setup.
App Configuration Sections Explained
| Section | What to Do |
|---|---|
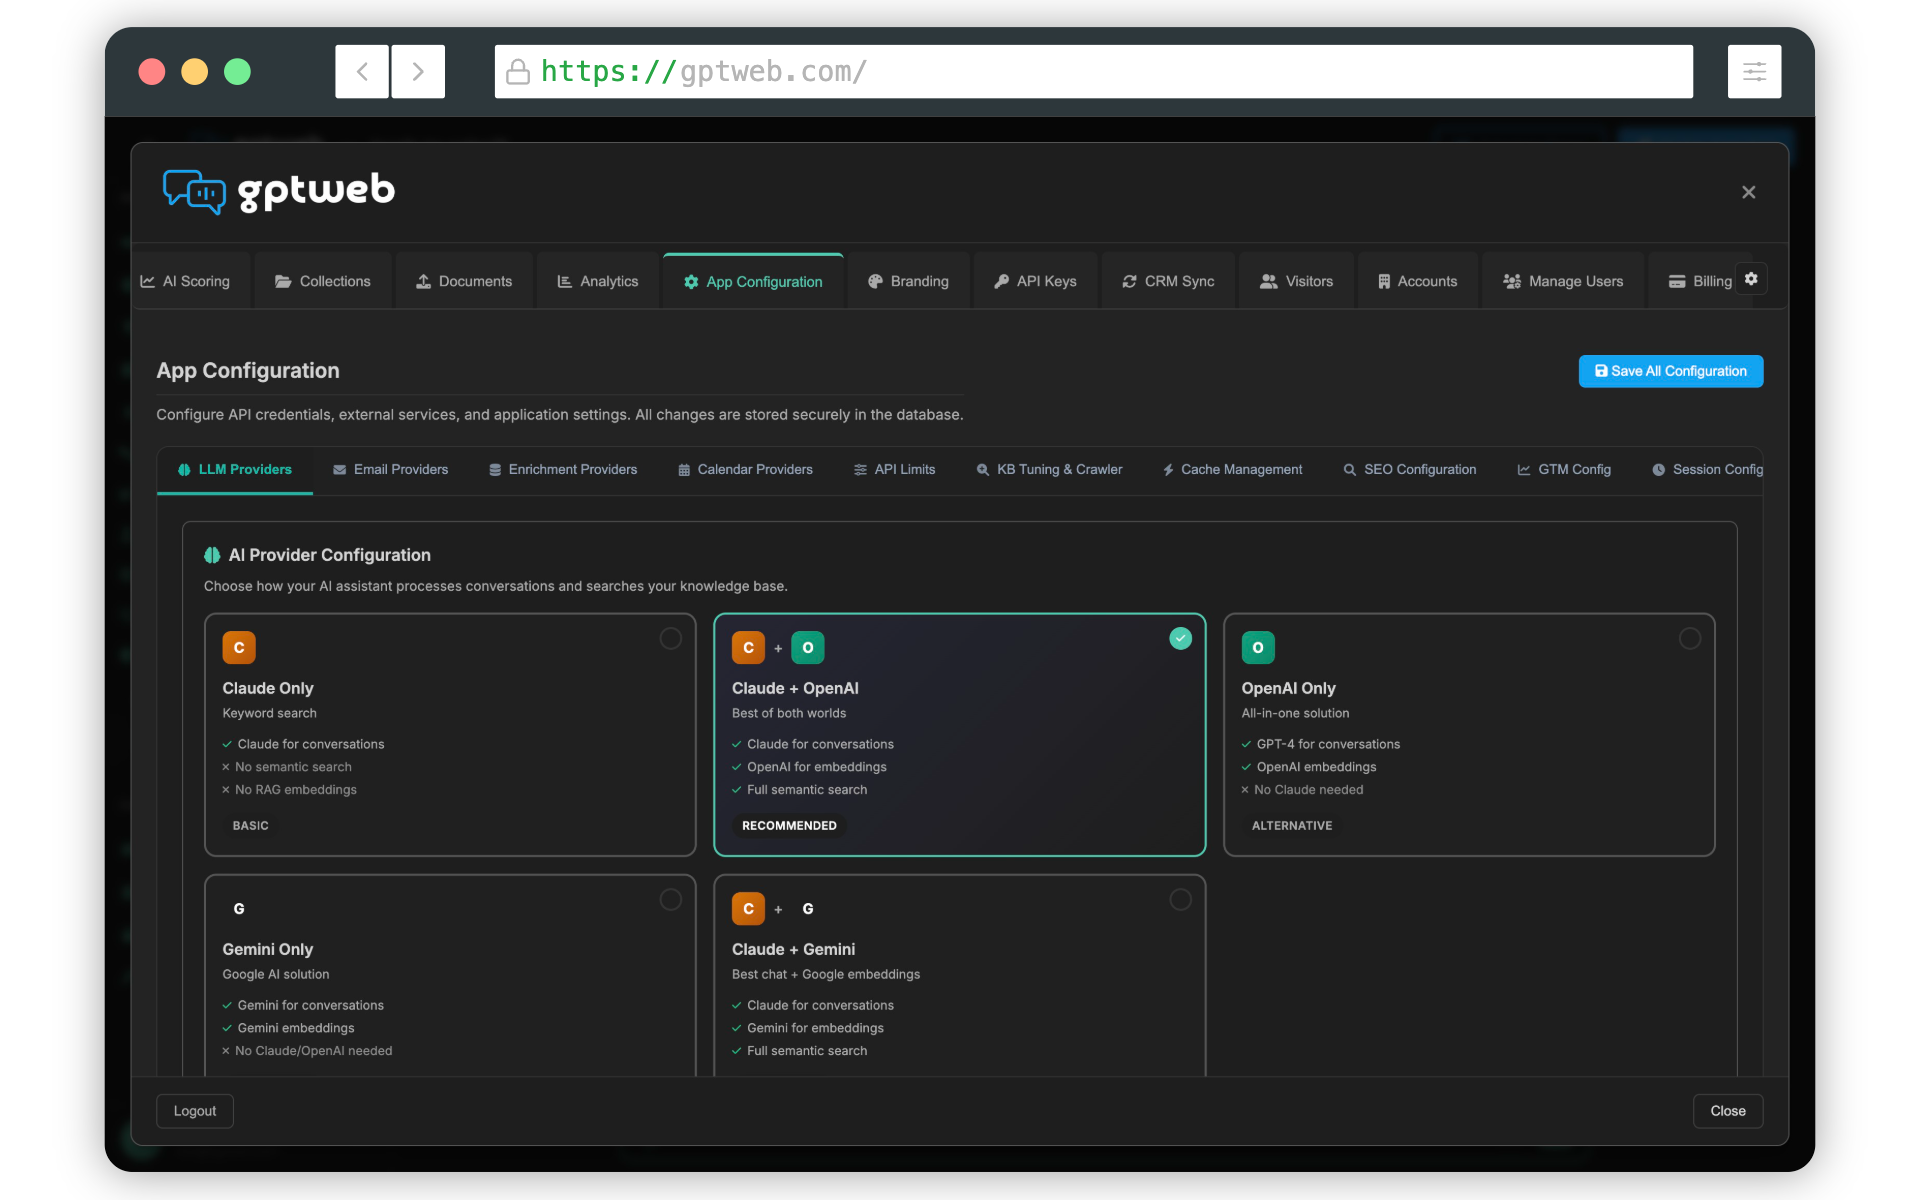
| AI Provider Configuration | Choose your LLM mode: Claude only, Claude plus OpenAI embeddings (recommended), or OpenAI for everything |
| Claude AI Configuration | Enter your Anthropic API key, select your preferred Claude model, and test the connection |
| OpenAI Configuration | Enter your OpenAI API key, select your embedding model, and test the connection |
| Email Provider Configuration | Set up SendGrid or Mailgun to enable outbound transactional and campaign emails |
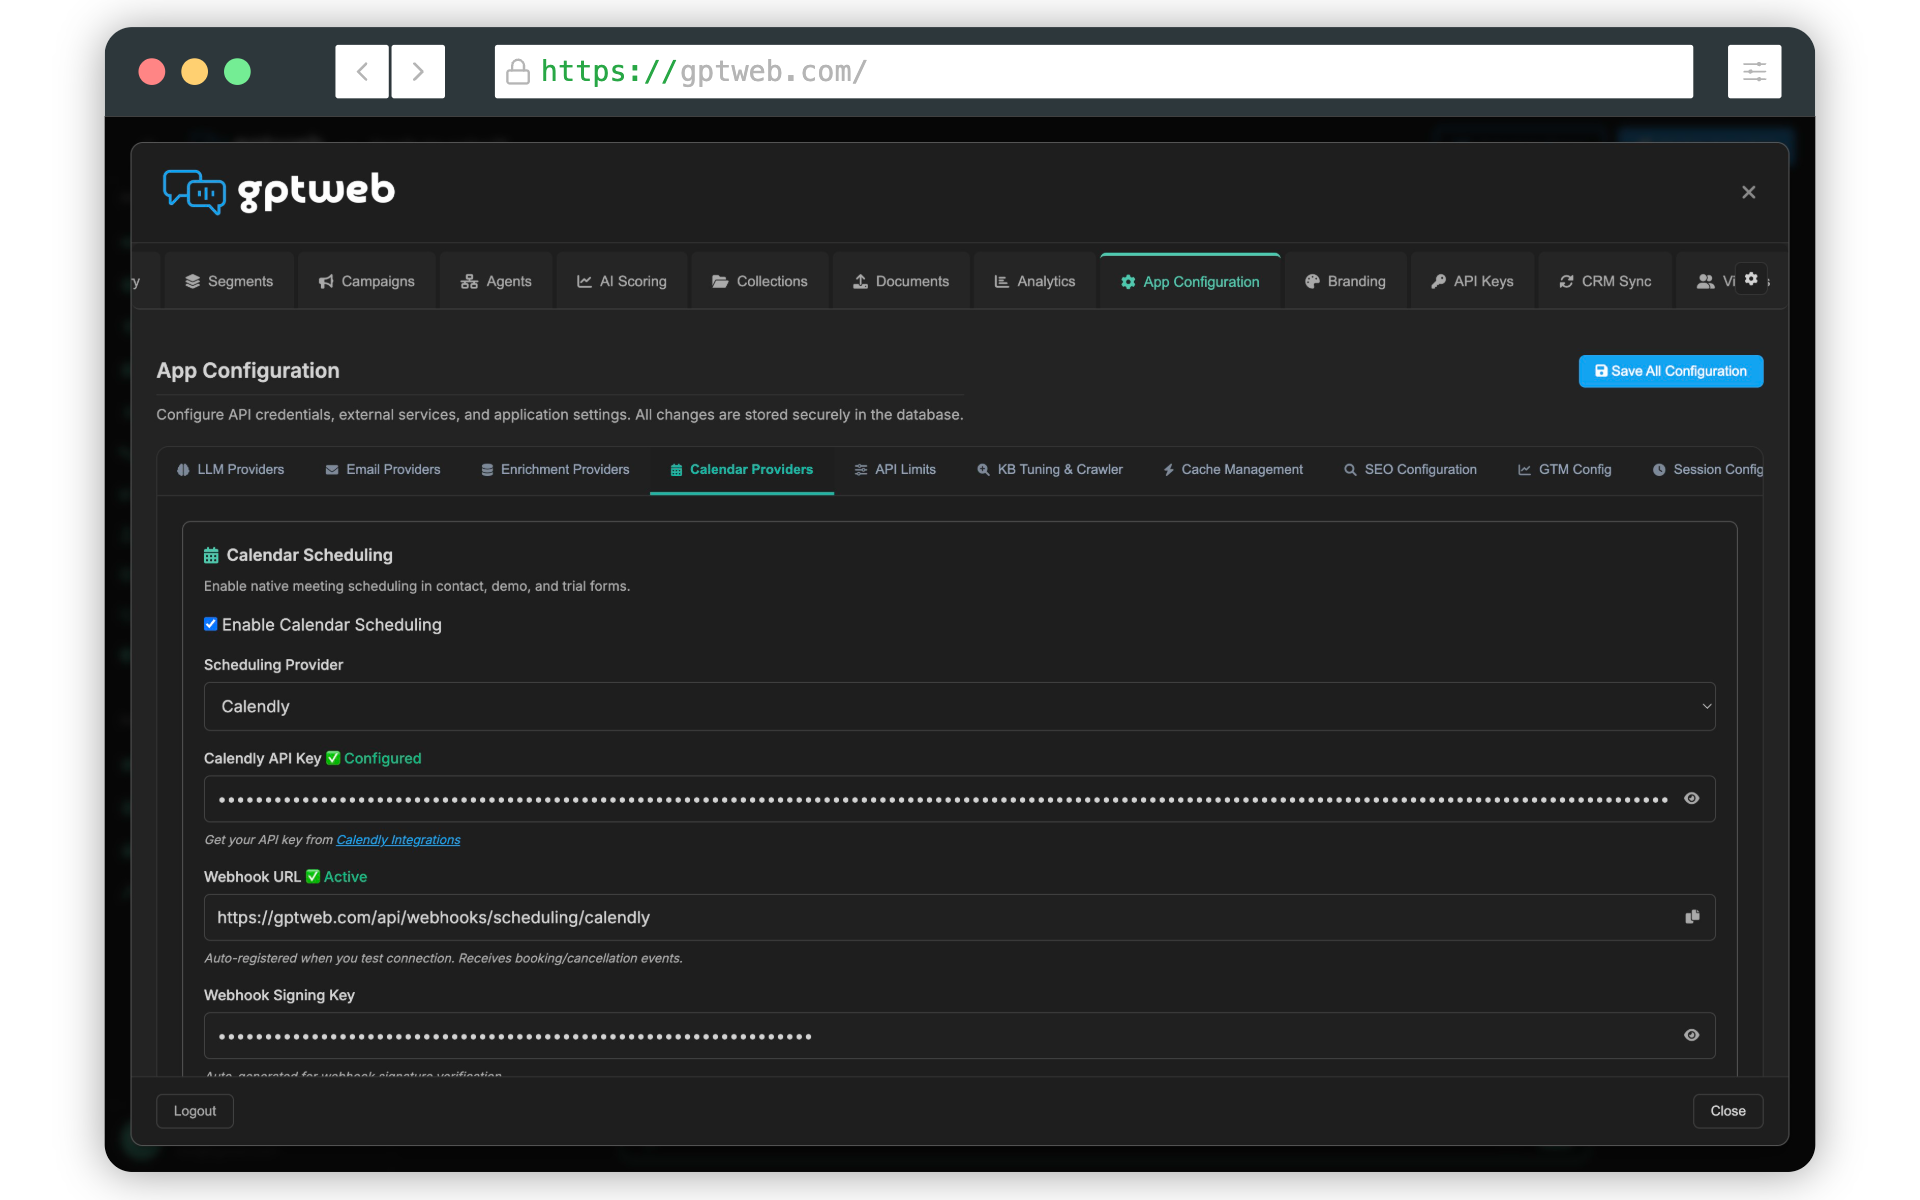
| Calendar Scheduling | Connect Calendly, HubSpot Meetings, or Chili Piper so visitors can book demos directly |
| RAG Search Tuning and Management | Adjust semantic search thresholds and access the Crawl Content button to auto-import website content |
| SEO and GEO Content Engine | Enable SEO exports and configure content generation settings |
| OG Settings | Upload your og:image and set social sharing title and description for link previews |
| Google Tag Manager Integration | Enter your GTM container ID to enable analytics and event tracking |
AI Provider Mode Comparison
| Mode | What It Does | Best For |
|---|---|---|
| Claude for chat (keyword search) | Uses Claude for conversations with basic keyword matching | Minimal setup or lower cost preference |
| Claude for chat plus OpenAI embeddings | Claude conversations with full semantic search capability | Recommended for most users |
| OpenAI for everything | GPT-4 for chat and OpenAI embeddings for search | Teams who prefer a single provider |
Step 4: Write Your AI Instructions (5 minutes)
Go to the LLM Instructions tab. This is where you define your AI assistant's personality, boundaries, and areas of focus. Describe what your organization does, what topics the AI should stay on, how to handle off-topic requests, and any tone or language guidelines. The more detail you provide here, the better your AI will perform. Click Save Instructions when finished.
Step 5: Build Your Knowledge Base (15 minutes)
Your AI needs content to reference in order to answer visitor questions accurately. Start by creating Collections to organize your content, then upload documents into those collections. The description you write for each Collection is critical because the AI uses it for intelligent query routing to find the right content.
Recommended Starter Collections
- Product Documentation - Feature guides, how-to articles, technical specs
- Sales and Pricing - Pricing tiers, ROI materials, proposal summaries
- Product Videos - Demo recordings, tutorials, feature walkthroughs
- Product Data - CSV or Excel files for AI-generated data charts
- Product Images - Screenshots, product photos, and visual assets
How to Create a Collection and Upload Documents
| Task | Steps |
|---|---|
| Create a Collection | Go to Collections tab, click Create New Collection, enter a name and a detailed description, select type (Documents, Images, or Chart Data), click Create |
| Upload Documents | Go to Documents tab, select your collection from the dropdown, click Upload Document, select your files or drag and drop them into the upload area |
| Auto-Import with Crawler | Go to App Configuration, scroll to RAG Search Tuning and Management, click Crawl Content, enter your site URL, set path filter and max pages, click Start Crawl |
Step 6: Set Your Welcome Message (3 minutes)
Go to the Welcome Message tab and write a short, friendly greeting that invites visitors to ask questions. Keep it conversational and encouraging. A great welcome message immediately sets expectations and motivates visitors to engage with your AI. Click Save when done.
Step 7: Add Favorites and Prompt Library Entries (5 minutes)
Favorites are quick-access links that appear in the sidebar for all visitors. Go to the Favorites tab and click Add Favorite. A great first favorite is a Contact Us entry using the Contact Modal type. For the Prompt Library, go to the Prompt Library tab and add suggested starter questions that visitors can click to immediately engage with your AI. These reduce friction and guide visitors toward high-value conversations.
Step 8: Brand Your Experience (5 minutes)
Go to the Branding tab and click the Customize sub-tab. Use the left sidebar to navigate through Logos and Identity (upload light mode and dark mode logos plus your favicon), Quick Setup (set your 6 core brand colors including Primary, Accent, User, Action, Background, and Text), Light and Dark Colors (fine-tune every individual UI element), and Custom CSS for advanced styling. Preview in both light and dark themes before saving.
Step 9: Launch Your First Campaign (5 minutes)
Go to the Campaigns tab to create a targeted message for visitors. Campaigns can be triggered by visitor behavior, segment membership, time on page, or other conditions. A good first campaign might welcome returning visitors or invite new visitors to book a demo. Campaigns are how GPTWeb proactively engages your audience and guides them toward conversion.
Step 10: Connect Your CRM (Optional, 10 minutes)
Go to the CRM Sync tab to connect Salesforce or HubSpot. This allows GPTWeb to automatically push Discussion Qualified Leads (DQLs) and visitor data into your CRM in real time. A dedicated integration user with Read, Create, and Edit access on Contacts, Leads, Accounts, Tasks, Opportunities, and Campaigns is recommended. GPTWeb does not require delete permissions.
What to Do After Your First Hour
Once your site is live and configured, here is a suggested progression plan to grow into the full power of the platform.
Week-by-Week Growth Plan
| Timeframe | Focus Area | Key Actions |
|---|---|---|
| Week 1 | Content and Conversations | Upload additional documents, refine LLM Instructions based on real visitor questions, monitor conversations in the Analytics tab, expand your Prompt Library |
| Week 2 | Segmentation and Scoring | Create visitor segments in the Segments tab, configure AI Scoring to identify your highest-intent visitors, review the Visitors tab for profile insights |
| Week 3 | Automation and Agents | Build Agents to automate visitor workflows, set up multi-step drip campaigns, verify CRM Sync is pushing leads correctly |
| Week 4 and beyond | Optimization | Review Analytics for conversation trends, refine campaign targeting, adjust RAG search thresholds in App Configuration, expand your knowledge base collections |
Quick Reference: Key Tips for First-Time Users
Write detailed descriptions for every Collection since the AI uses them for intelligent query routing. Test your AI after every major change by asking it questions directly in the chat interface. Use the Visitors tab to review real conversations and identify gaps in your knowledge base content. Configure your email provider in App Configuration before launching any email campaigns or drip sequences. For booking demos, connect a calendar provider in App Configuration so visitors can schedule directly from a conversation.
Getting Help
| Resource | Details |
|---|---|
| Email Support | support@gptweb.com |
| Sales Inquiries | sales@gptweb.com |
| Website | www.gptweb.com |
| Free Trial Signup | gptweb.com - click Start Free Trial |
| Billing and Plan Details | Admin Panel - Billing tab |
GPTWeb is the future of engagement, websites, and marketing automation combined, built for the AI era and built for now. You are all set to transform how visitors experience your organization!