Knowledge Base
Starting Campaigns on GPTWeb — Step by Step
Quick clarification — GPTWeb doesn't 'submit' your website to external services. Instead, you launch campaigns directly on your GPTWeb site to engage visitors the moment they arrive. Think of it as your site proactively reaching out to visitors through smart, targeted messages — toasters, modals, in-chat messages, and chat bubbles. Here's exactly how to get your first campaign live.
Campaign Types — Choose Your Format
| Type | What It Looks Like | Best For |
|---|---|---|
| New Chat Message | Standalone chat bubble from your AI assistant | Announcements, conversation starters |
| In-Chat Message | Styled card embedded within an AI response | Contextual offers, related resources |
| Modal Overlay | Center popup with backdrop | Lead capture forms, demo requests, announcements |
| Toaster Notification | Small notification in the corner | Soft engagement, tips, welcome messages |
Creating Your First Campaign — Step by Step
| # | Step | Why | Where |
|---|---|---|---|
| 1 | Open the Admin Panel with Cmd+Ctrl+A (Mac) or Ctrl+Alt+A (Windows/Linux) | All campaign controls live here — this is your command center | Keyboard shortcut on your live GPTWeb site |
| 2 | Click the Campaigns tab in the left-hand menu | This is where all campaigns are created, managed, and monitored | Admin Panel → Campaigns tab |
| 3 | Click + Create Campaign and select your campaign type (Toaster, Modal, In-Chat, or New Chat Message) | Different formats serve different engagement goals — Toaster is easiest to start with | Campaigns tab → + Create Campaign dropdown |
| 4 | General Tab: Enter a Campaign Name, Description, and set Status to Active | Status must be Active for visitors to see it — Draft means it is saved but hidden | Campaign Editor → General tab |
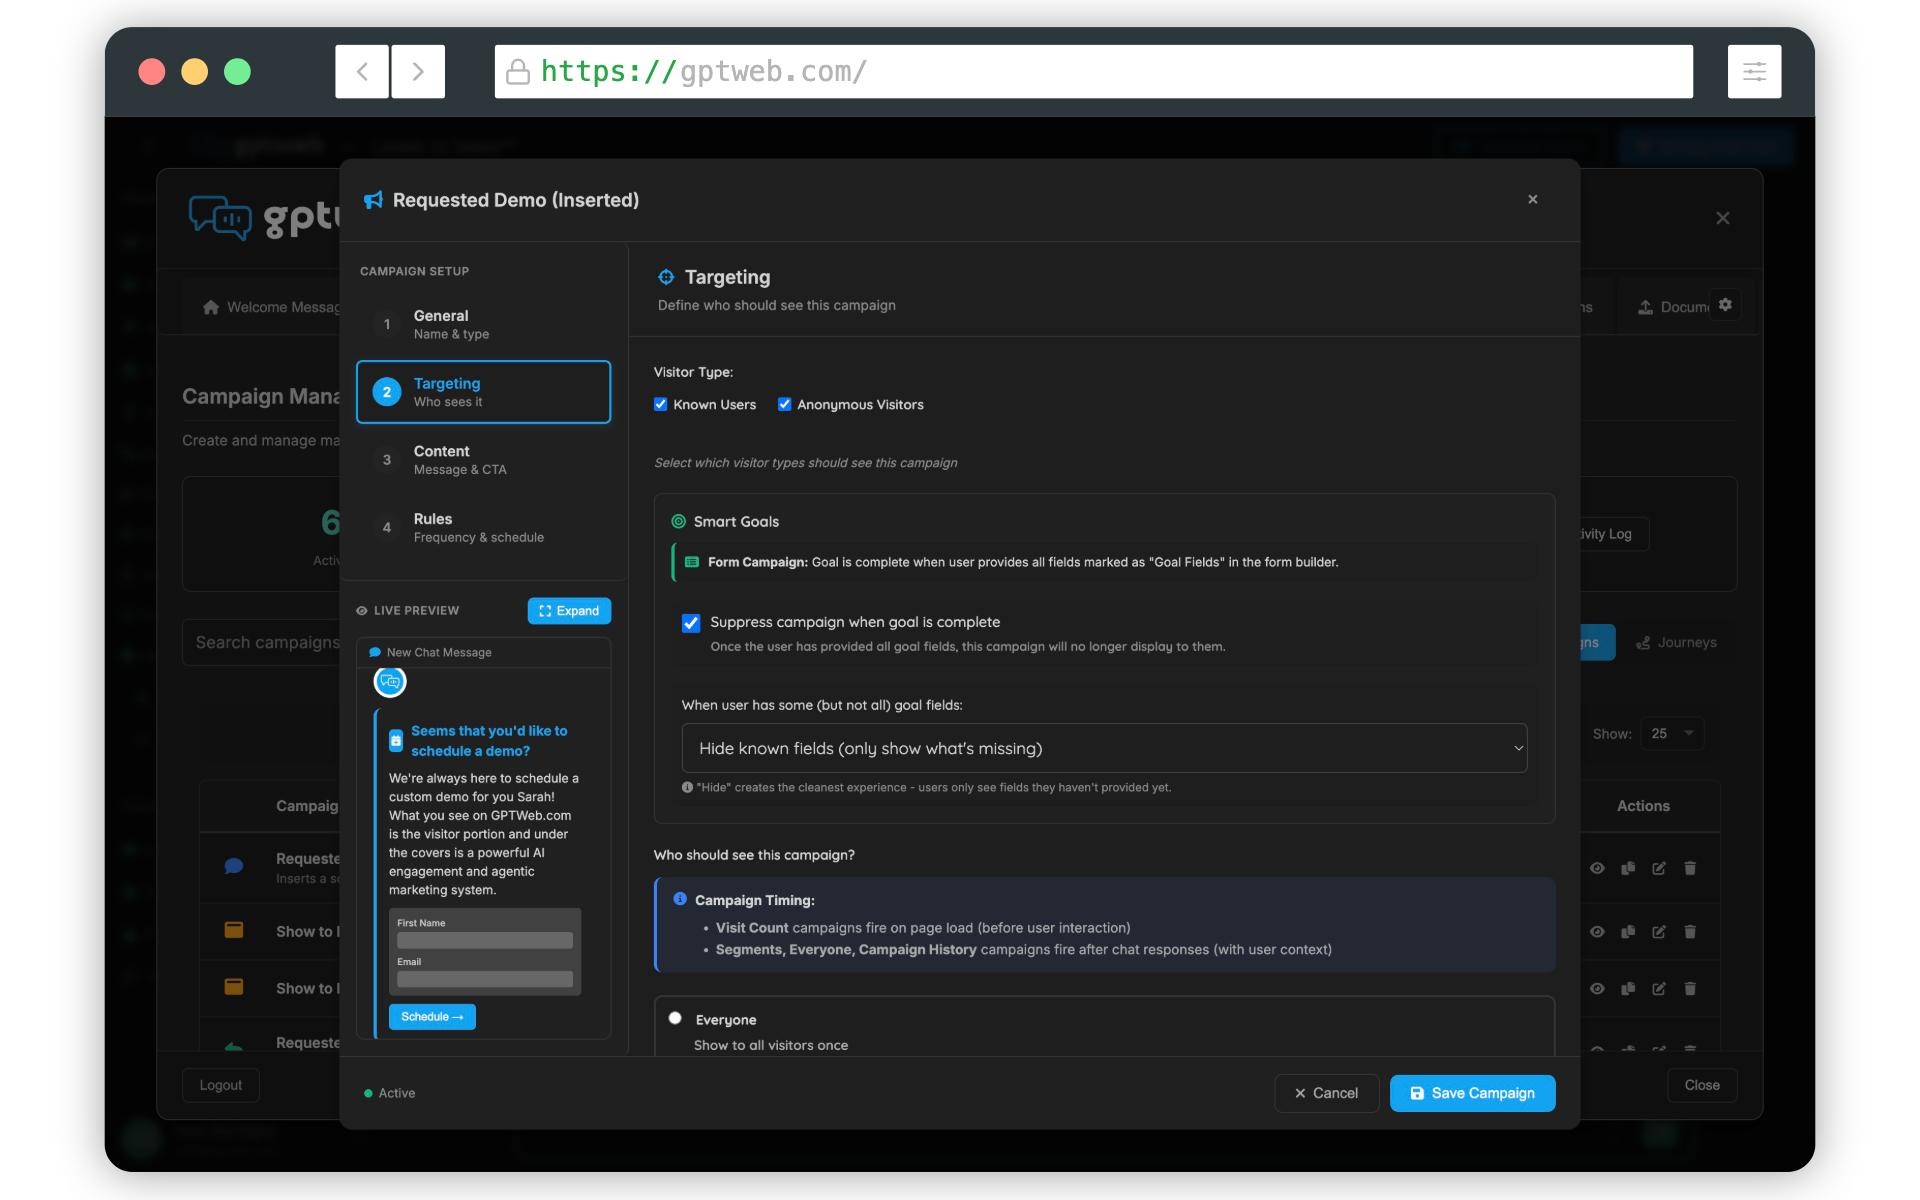
| 5 | Targeting Tab: Set your Targeting Mode (e.g., Time on Site with 30 second threshold) | Controls exactly who sees the campaign and when — prevents showing too early or to wrong audience | Campaign Editor → Targeting tab |
| 6 | Optionally select Specific Segments to narrow your audience | Segment targeting ensures your message reaches the most relevant visitors only | Campaign Editor → Targeting tab → Targeting Mode dropdown |
| 7 | Content Tab: Write your Campaign Title, Message, choose CTA Action (Link, Form, or Chat), and set colors/icon | This is what visitors actually see — the live preview panel on the right updates in real time as you type | Campaign Editor → Content tab |
| 8 | Rules Tab: Set Max Displays, Cooldown Period, Display Delay, and optional Start/End Dates | Controls frequency and scheduling — prevents overexposure and respects visitor experience | Campaign Editor → Rules tab |
| 9 | Click Save Campaign | Nothing goes live until saved — always save before navigating away | Campaign Editor footer → Save Campaign button |
| 10 | Visit your live site and verify the campaign appears as expected | Real-world testing ensures targeting rules and timing work correctly before all visitors see it | gptweb.com/site/your-company-slug |
Rules Tab — Key Settings Explained
| Setting | Description | Recommended Value |
|---|---|---|
| Priority | Higher number = shown first when multiple campaigns are eligible (range 0-100) | 50 for normal, 80+ for urgent |
| Display Delay | Seconds to wait before showing campaign after page load | 3-5 seconds feels natural |
| Cooldown Period | Hours before same visitor sees the campaign again | 24-72 hours typical |
| Max Displays per Visitor | Total lifetime displays per unique visitor | 1 for announcements, 3-5 for offers |
| Start Date | When the campaign becomes eligible to display | Leave blank for immediate start |
| End Date | When the campaign stops displaying automatically | Leave blank for indefinite |
| Allow Repeat in Session | Whether to show multiple times in a single visit | Off recommended for most campaigns |
4
Campaign Types Available
~5 Min
Setup Time (First Campaign)
6 Cards
Performance Metrics Tracked
Real-Time
Live Preview
Pro tip: Start with a simple Toaster Notification — it is the least intrusive and easiest to configure. Set targeting to 30 seconds on site, keep the message warm and inviting, and set Max Displays to 1. Once you see it working, layer in AI Segmentation targeting and more advanced campaign types like modals with lead capture forms. Need help? Contact support@gptweb.com or [](gptweb://modal/demo) for a guided walkthrough of the campaign engine.
GPTWeb is the future of engagement, websites, and marketing automation combined — built for the AI era, built for now.